Monday, December 29, 2014

Skyrim - Dragon Priest Mask - Update I

Hey guys,

It's been a long time since I've posted here, and I'm currently finishing a write up for the Harley Quinn Mallet I did a while back. I will hopefully be posting at least 1 more project after this one before schools starts up again, and I don't have the time.

What's more to say SKYRIM! DRAGON PRIESTS! MASKS!

I'm excited and I hope you are too.
This will be my first brush on silicone application, I'm a little nervous, but if you don't try you will never learn. In the spirit of getting work done I leave you with this, a picture of the 3D Print to be molded and casted (more details on that later).

Enjoy.

Monday, August 4, 2014

Skyrim - Windhelm Hold Shield - Update II

So this is long overdue, but this past weekend I was able to get some time on the Shopbot Alpha and finished the main cutting of the Pink foam base for the shield.  The first two pictures are from my first attempt, I learned a lot from it, and you can see that I struggled with registration. The side I started with (first picture) is perfect, however when I flipped it over and registered it based on the corner of the foam, you can see that it's probably 1/2 an inch skewed/offset. So this is how it sat for a couple weeks.


At the same time I cut the first batch of foam, I cut the MDF. I'm using MDF mostly because it's cheap and readily available. Although not pictured, my first attempt was on 1/2 in MDF. The main board grains were cut 1/8 in deep, the actual grain lines were cut 1/16 in deep. This gave it a really accentuated pattern which I really liked. I switched to 1/4 in MDF though to save on weight so that changed the depth at which I could cut. The board lines in this instance are 1/16 in and the grain lines are 1/32 It's still pronounced, but requires weathering to really accentuate it. I cut an additional mdf blank a bit deeper and will compare before I put the final piece together as to which I like better. I think I will be leaning towards the deeper cut one just based on recognition.


Onto how I fixed my foam cutting issue. When I first cut it I was using the bottom left corner as the origin point. With this version I switched the origin to the center point. The cutting was done with a 3/4 in router bit, so at the center of the piece I plunged and cut a hole all the way through. I cut a pocket the size of the MDF insert and slightly larger in the thickness, so that it would sit below the level of the foam. When I went to flip it, I sent the machine to the home position 0,0 - and then used the hole I cut to slide the foam over the bit and effectively re-center it. This got it to within an 1/8 of an inch, which was pretty good in my book. Since I knew the center point was 100% registered I ran a cut job and trimmed excess making sure the outside was a uniform size all the way around on both sides.

In the picture there are some blue lines these we scribed with a sharpie and a compass and I will be using a fine rasp to chamfer from line to line to create the rim of the shield.


A word about the photgraphy - I know it's not the best. I'm trying to get a place set up to where I can actually document my work (not just taking some Iphone pictures). These didnt come out as great as I liked and are heavily processed in Photoshop as a result (auto-color). This will be an ongoing challenge for me so please bear with it.

I've got to go cut those chamfers and hopefully I can work some more on this; this week or next.

If you guys have any questions regarding the cutting process my previous entry was pretty detailed, but feel free to let me know. I appreciate any and all feedback.

Cheers,
Kevin

Sunday, July 27, 2014

Quick Updates

Hey guys,

I think a few things will be put on hold and some new projects started.
I'm still in the middle of a large project that I can't talk about just yet, but instead of finishing the Venture Bros stuff, which I will, I'm just gonna turn my attention to doing a full Destiny Hunter build.

I have the Knife made already, I've been wanting to learn how to rotocast so this is a good opportunity for that, specifically with the helmet. I will also be working on a set of armor (greives, chest, and legs) at this moment to be determined.

The only project that will continue is the Skyrim Hold Shield, because my membership at the Tech Shop is soon to be over, and I need there 4x8 CNC for the main piece.  (I'll be writing an update soon).

School is starting up again soon, so there may be a huge gap inbetween updates, but I will be doing my best to update you guys as soon as I can.


Cheers,
Kevin 

Tuesday, July 22, 2014

Support

Do you find yourself in need of an awesome new Hunter Knife from the upcoming game Destiny?
Do you want to help support a prop maker?
Does buying things make you happy?
Have you ever thought about how cool you are?

If you answered yes to any of these questions, you may want to check out my Etsy page :)
I will be forever grateful, your support will allow me to continue to make awesome replica props! 

Battosai Props on Etsy

Monday, July 21, 2014

Destiny - Hunter's Knife - Final Update


Hey Folks,


Here's the conclusion of the Hunter Knife build from Destiny


So it's come time to paint. This is were I have the least amount of experience with prop making, being so relatively new to the scene, I've only had the opportunity to paint several pieces. I used to do some model painting for Warhammer 40K, but that knowledge has long since passed, it's been ages.

Let me first discuss what I'm using. With this piece I wanted to get it as close to my reference image as I could, but still wanted it to pop, so painting a myriad of grays was a thought, but metallic is always nicer. I had thought about going the flat black route, but at that point much of the detail gets lost. I found this nice metallic spray paint (pictured left most) at my local Home Depot, but it was just a little bit too light for my liking. I stopped by Michael's to grab some random bits and bops, and saw what I thought was a nicer silver spray paint (second from the left), but it turned out to be a transparent black. This was perfect because I could get my nice metallic color and effectively blacken it to the darkness I preferred. I bought some generic Matte clear, because I'm not a huge fan of gloss and a blade that's been 'used' typically isn't new and shiny. The last two are acrylic paints and these will be used to Weather the blade once the major painting is done.

I should mention that in this post, I will also discuss the way I created the wrap for the handle, but that will be after the paint, so it may be a little lengthy like the previous article.


Unfortunately, I don't have a nice spray booth or area were I can really set one up, so for this piece I hung it from my garage door by a coat hanger to do most of the major painting. (picture of the set-up is above).


So as before, before I casted the piece it went into primer. So this is the original cast now in primer, lightly sanded and ready for the first coat. I'm not too particularly careful with painting this as the haphazardness lends itself well to the overall weathered feel of the blade, so if a little shows though, that's cool.


Here's a close up detail shot of the color that the metallic spray paint produces against a gray primer. Pretty rad in my opinion.


So after some transparent black, this is the darkness I was really looking for. It's still got the metallic sheen, but it not 'new'.

Weathering was the next step, and to be honest this is the first time I've tried it, so I had some mixed results. I started with the silver acrylic and applied a layer on the blade side to show that the blade had been used so the black was worn off. (this is common with guns that are blued, the wear parts show through to bare metal) With a basic bit of silver on the piece, I added some around the finger grooves and then switched to the black acrylics to add a depth of grime to the piece.


You can see this grime very nicely in the photo below.  Although not photographed in the original paint line-up. I also used some primary color acrylics (red, blue, yellow) to make a rust color and sorta patina'd the blade towards the middle. I think for the first time It came out pretty good. Most of the paint was applied with a paper towel by blotting it on. excess was removed with a wet cloth. I did try to use a fine paint brush, but it developed too much of a hard edge. So I assume with practice I'll be able to do more with that later. After I had the weathering where I liked it, I used a matte clear to seal in the detail, if you will. I only used one coat, but I believe I will shoot another over the wrap and final detail work tomorrow.


Finally, the hand grip. On my reference image the material was pretty difficult to pinpoint for me, it seemed like thin strips of ace bandages, but my dad was looking at it one night and came up with a great idea to use flat shoe laces. I purchased a 72 in pack of generic black probably 1/4 in wide shoe laces. Cut one of the pointy ends off and sealed it with super glue. Wrapped the handle for the desired effect and weathered it with paint, using the same techniques this time primarily with a mixture of silver blue and black.


To be honest the above picture does not do this piece justice, when I get around to setting up an area to photograph my work I will reupdate it, this piece came out great! I added a little bit more black to the destiny logo to give it more pop and viola.

I hope you guys have enjoyed this build, it's been a lot of fun to do, and I've learned a lot along the way.

As always if you have any questions, feel free to ask, I would also love to hear any feedback.

Cheers,
Kevin 


Monday, July 14, 2014

Destiny - Hunter's Knife - Update III

This weekend was all about making the silicone mold for and casting the first hunter knife!

So I've never really been good at figuring out how much I should leave around my master for the mold box. I think the rule of thumb is at least 3/4 of an inch, but I probably ended up closer to 1/2 in. The mold overall is roughly 1 1/2 inches thick, so about 3/4 thick for each part of the two part mold.


Clay lay-up is really tedious work. The basic process for a two part mold is your prop is split in half by the clay - the first half of silicone is poured, then the clay is removed and the second half is poured. The reason for this split is because this is where your parting line will be once you've cast the piece in resin. I started with a base layer of clay. I then placed my blade how I wanted it in the mold and added a thin layer of clay all around it. I like to build in my own pour and air vent 'holes' in the mold before I pour my silicone. I do this with acrylic rods in this case 1/4 of in piece I cut and sanded to the appropriate size/angle. (I also used the 1/4inc and a [3/8 or 1/2] acrylic rod for the registration keys in the mold).


It is very important that you use a mold release on all surfaces before pouring your silicone. I used Mann-Ease Release 200. The silicone I am using is Smooth-On Mold Max 14NV. The main reason for this type of silicone is because I do not have a vacuum degassing system. If I did, I would prefer Mold Max 30. If anyone is curious for the mold box I am using some Melamine board that I cut to the desired length and clamped together with some quick clamps. [Melamine seemed to have worked pretty well I did have some peeling on the surface after removing the box, but there was no sticking with the silicone] In the past I've used thick sheet acrylic (1/4), thin sheet acrylic (1/8), but I've also seen people use Lego bricks to build a structure around there object. Imagine if it doesn't leak and isn't porous, it should pretty much do the trick.


Mixing Silicone is something I'm also not 100% on yet. 14NV mixes at a 100 parts A to 10 parts B, math not being my strong suit I use the Smooth-On calculator for silicone to get a rough idea of how much I will need, and I tend to mix slightly more. (you can always have excess, can't always mix more in the middle of a pour). With a working time of 40 minutes and a demold of 4 hours its pretty quick to dry. I prefer not to discuss registration keys at this point as the first attempt (a different project had mixed results) so this is my second attempt and I certainly don't think it's been perfected just yet.


Once the first half of the mold was poured (I waited overnight) flipped the piece over and very carefully removed the clay backing layer - making sure that the kinfe did not dislodge itself from the silicone. A little cleaning of clay along the edges and from the silicone surface goes a long way at this point. I put the mold box back together and prepared it with more mold release. Mixed up another batch of silicone and it was on its way.


For resin, again I am using Smooth-Cast 305, because it's what I have laying around, given the opportunity for something of this size I would probably use Smooth-Cast 300. The difference being the working time, which I've discussed in a previous write-up. Or maybe Smooth-Cast Onyx to get closer to the overall finish of the piece instead of starting with a white cast.


The mold was cleaned with a soft cloth and my clay tools were used to remove all excess clay once the two halves were separated. I just down some 1/2 in MDF to act as a backer board for the mold since it needs to be poured standing up. The mold was prepped with baby powder - and the resin mixed and poured.


30 minutes later I had my first cast!

The first cast came out great, with a little bit of cleanup work, it will be ready for
paint.  


This write-up has already gone on for too long, so next time we will paint and finish this pieces. I know there's a lot of information in this post so if anyone has a detailed question regarding any of it, please feel free to ask. Thank you for reading and I appreciate any and all feedback.

Cheers,
Kevin

Sunday, July 13, 2014

Skyrim - Windhelm Hold Shield - Update I

So it seems these days almost everyone has done something from Skyrim, this is the first part of a Skyrim project I'll be working on. The latter I'll keep a surprise, because I'm not sure when I'll be getting to it.

So I had a few rough ideas going into this as to what I wanted to accomplish or at least what techniques I wanted to use which would set myself apart from other Skyrim Shield builders. If I were to cite anyone for inspiration it would be Harrison Krix of Volpin Props, but I would wager to say that my shield will have been done almost 100% differently (with the exception of materiality in one instance).

Having access to a large format CNC machine made this process of cutting out not only the 'large' circles easier, but also made me think about how I could carve in the wood grain. With this piece I was going for an almost uncharacteristically exaggerated wood grain/pattern that was reminiscent of the shield itself. (the board splits were drawn in Illustrator using the shield as a template).

This weekend I made my first test cuts, I did not have the material I needed for the finish piece, but I decided to try it regardless. It was a pretty good success I would say. From a far the shield looks stellar, up close its noticeable that the main board grooves were cut a little too deep. I'll explain process in a minute.

The material I used was 1/2 MDF (I will use 1/4 for the finished piece). I wanted this shield to have a large presence (I didn't plan to use it for a Con - just to have lying around/mounted on a wall). So with that in mind, my outside diameter for the shield is 27.5 and is made from 1in pink insulation foam (Foamular) which can be purchased at your local Home Depot for ~19$ a 4'x8' sheet. The inside diameter and effective wood pattern is 25 inches, unfortunately 1/4 MDF cannot be purchased at home depot like the foam. It's difficult to say exactly where you can get it, but any specialty hardwood dealers, that also carries sheet goods should carry it. I'll be purchasing mine from either Spellman Hardwoods or Superior Lumber, a quick google search of your area should return decent results.

So a little about the process and the tools. I have access to a Shopbot PRS Alpha system which is a full 4'x8' CNC (Computer Numerically Controlled router) with 6" of Z travel. The shield outside (pink foam) was cut with a 1/4 down-spiral two-flute straight bit, in roughly 4 passses .25 each time. The grooves in the wood were cut using a V-bit. The issue with my test cut was I used a much larger bit then the one I initially had so it cut too wide compared to what I was expecting. For that I used a 1/2 inch 90 degree V-Bit. In the future or for the finished piece I will be using a 1/4 inch 90 degree bit. The main wood grooves were cut in at roughly 1/8 of an inch, where as the wood grain itself was roughly 1/32 of an inch. Just enough so you know it's there without being too deep/obnoxious.

Having now had time to think about how the piece looks currently/will look in the future, I decided it would be best to mill a recess in the pink 1/4 in deep to accept the wood, as I didn't want the shield to exceed 1 inch (handle not included).

I guess this is the effective ending point for update 1. Due to it being such an early point in the build I'm hesitant to post pictures, as I'm not comfortable with how it looks as a whole. So we'll leave it at that, and I hope it'll be alright. With the next week soon here, I will be getting my 1/4 in MDF and will be CNC'ing it as soon as I can. 

Look forward to more updates as soon as I can get materials and some time after work.

I think the write up is detailed enough, maybe too much, but as always please feel free to comment and let me know your thoughts, concerns, any question etc, I appreciate them greatly.


Cheers,
Kevin

Tuesday, July 8, 2014

Destiny - Hunter's Knife - Update II

Here's a quick Destiny Knife Update for ya guys!

This past weekend I had the opportunity to get my hands on some ABS glue, so I glued the Knife blade together. It went pretty flawlessly. Although I don't have anything to show for that process, I can say that I need to use clamps to insure that the seems were a 100% perfect match or as close as I could get to it. 

With the way dimensions printer prints is called FDM printing (fused deposition modeling). It works on the principle that the printer head extrudes ABS filament, in layers and builds up from a platform. But in order for it to work it has to stop and start extruding. This had left some undesirable areas on the knife (areas that were not complete kinda just like two strands of filament not connected to anything and this was also limited by the resolution capabilities of the printer itself). So I turned to my trusty friend Bondo and faked it. I sanded the abs down where it wasn't correct and rebuilt the edges with a light coat of bondo. Fortunately, the majority of the 'damaged' areas were in the handle part so there wasn't to much difficult bondo work that needed to be done.


On the surface of the knife there was small crosshatching patterns that are also a result of how the printer finished a surface. Back and forth at 45 degrees lines of filament - one in one direction, another in the opposite. Texturally, this wasn't gonna do so once I finished bondoing I put spot puttied on the entire piece - both sides.

All the spot putty sanding was done with 320 grit again, because its what I had laying around. And I rather like how much or little it can take off based on pressure and vigor. This wasn't particularly difficult, but it required a fine attention to detail to ensure that the holes and destiny logo details didn't get filled in.


After the spot puttied was sanded and to a consistency I was happy with, It was time for primer.
I just used what I had laying around the house (I think in this case it was Krylon primer).  However given the option for the first few coats of primer I generally use RustOleum filler primer - it does a great job at covering and is very quick to dry, especially in the AZ heat. Forgive me for the next two images, they aren't of great quality - I was in a work flow where I just snapped some photos and kept going never checking them until now.


After the first coat of primer, I applied spot putties to areas which were still not up to par. It was sanded to 320 once more, than resprayed with primer - a slightly thicker coat this time.


After the primer had dried, the piece was pretty good, I used some 600grit wet or dry sandpaper and wet sanded the blade. Wet sanding is exactly what it sounds like, wetting the sandpaper to help with finer sanding work. (generally with fine sandpaper, when you sand what you're sanding gets built up in the paper, the water helps to keep the paper from getting gummed up). In addition the 600 grit will help to make the finish on the blade almost like glass. 


The blade is now ready for molding, and with any luck I'll be picking up some Silicone from my local Reynolds Advanced Materials - Friday - and we can begin the process of molding and eventually casting this knife.

Thank you guys for reading and as always feel free to ask question and comment, I'm always open to suggestions and love hearing feedback.

Cheers,
Kevin


Thursday, July 3, 2014

Venture Bros - Henchman 21 - Belt Buckle Update II

So it's been a little bit since my last update, but I've been working on a project I can't post quite yet, it's a secret build if you will :)
Here begins the little talky bit before we get to the meat potatoes (images). Again I wanted to use vacuum-formed molds to pour my resin into so that I didn't have to waste silicone which would have been significantly more costly. This was my first experiment and it went a little bit different than I had hoped, but anyways check it out.


Pictured above is the belt sculpt in spot putty sanded to 320 (it's just what I had on hand - 180 would have been fine). It's by no means perfect, it's pretty good, but I wanted to start doing some tests on it.
I will create another post in regards to the vaccu-forming process and the machine I am using to do it with, but let's continue. 


Here are two pulls I made on the machine. The first pictured further away the plastic was much too hot for Styrofoam, so it's difficult to see, but a lot of the material got vacuumed into the Styrofoam, making the removal super difficult. As a result I had to cut the piece out of the plastic, so a bit of it was lost. The way around this would be to seal the whole thing first leaving no foam visible, my mistake! The second pull the material had less time under the oven, it came out a bit better, but lost some of the finite details. Regardless at this point my original sculpt is technically junk, so if I need to do anymore I will have to re-sculpt it.


The resin I'm using is Smooth Cast 305. It's not ideal for this specific application, but I used it just because it's what I had laying around. More ideal would have been Smooth Cast 300, the biggest difference being the working and cure time (305 is meant to give you much longer in both departments). I had this resin because I was working on a sword that was 29.5 inches long and I didn't want it to cure too quickly before all the bubbles had settled. (I will do a write on the sword later as it was originally a joint project).


Pouring the resin, nothing special, I used some scrap EVA foam to help position the molds as the gem shape made them impossible to stand on their own.


Here's where it starts to get interesting! Although not pictured, I used Mann Ease-Release 200 on the plastic before I poured the resin. Wishful thinking I guess....

I literally had to use a pair of pliers to pry/peel the plastic off the first cast. I knew going into this, that would probably be the case (these were a cheap way to mold something quick and dirty - I didn't expect to get them back, but it would have been nice).

Aside from that the resin cured nicely, instead of using pliers on the last cast pictured, I'm attempting to let it heat up in the sun for a while, see if it frees itself from the plastic or if due to the heat during the curing process is truly melted into it (or at least pretty darn close to being melted)

Below are some close-up photos of the pieces - for documentation. 


In summary, these were a success? The casts didn't turn out all that great, and that's partially the fault of the mold (and further the fault of the sculpt), but I knew this going into it. This is something that I'm working on for myself so it doesn't have to be 100% beautiful. Instead I can now take my piece of plastic and work it down to something that more perfect through sanding, use of a dremel etc. As for the second piece we will see how it comes out and I'll probably mention it in the next posting.

Next time we will be painting, potentially attaching some hardware and figuring out how to make this into a functional belt buckle!

Thank you guys for reading, as always if you have any question, comments, thoughts, please let me know.

Cheers,
Kevin 

Saturday, June 28, 2014

Venture Bros - Henchman 21 - Belt Buckle Update I

Here's some more progress on the Henchman 21 cosplay!

I'd like to make a resin cast of 21's Belt Buckle. I haven't figured out how I'm going to attach it, but I am hoping to make it at somewhat functional belt buckle. (and belt in general) Further elaborating on the resin cast, I plan to do this by creating a vaccu-formed shell of the buckle (what I'm carving), then using spray mold release I'll just pour the resin straight into that. Silicone is expensive and for a one time use seems like an extravagant waste. Much like the Mask, this process is very similar. 


It starts with a template, after scaling the size of my reference photos to my own height I took some basic measurements, from that I turned to my trusty 3d modeler - Rhinoceros - (I prefer it to Illustrator, as I'm not familiar with the newer versions of Illustrator (I have CS3) shortcuts, etc). I printed it out and viola.


It get's traced onto another piece of hard green styrofoam, and cut out. Initially I rough cut it and then shaped it. The result of that can be seen in the next picture below. However I wasn't very happy with this because it was slightly oversized and I found trimming the sides down to be rather challenging. So I scrapped it, and started anew following the same method, but this time cutting it exactly too the lines before I worked on the middle 'gem' if you will. Again all the carving and shaping was done with a 13 inch serrated bread knife, I will have to get some photos up of the tools I use at a later date!


Last but not least, Bondo! Although the green styrofoam is hard enough to withstand vaccuforming pressure, the way it's composed could potentially cause small concave bubbles or imperfections in the plastic once vaccuformed. By bondo coating it, you are making a surface that, depending on the amount of time and effort you put into it is 100% smooth and none of those imperfections can occur.

I still have to do another coat to build up the bottom edges as well as some of the area that didn't come through. Finish sand and this weekend I may be able to try a few pulls on the vaccumformer. If not this will probably be address again sometime next week. I should mention that this will be the test before I do the mask to make sure that as an idea this will be sound!

As always feel free to ask me any questions, comment on what you like and what you don't like, I appreciate any and all feedback.

Cheers,
Kevin

Wednesday, June 25, 2014

Destiny - Hunter's Knife - Update I

Destiny is an upcoming online multiplayer action role-playing first-person shooter video game in a "mythic science fiction" open world setting. It's slated for release on September 9th 2014, and will be launched on both new gen systems as well as the PS3 and Xbox360.

With people playing the alpha and the beta soon on it's way, I can't help but really love this game! Aside from it looking absolutely beautiful, the weapon designs are super unique and look like they would be a lot of fun to make! Gun builds are cool, but I'm a fan of blades, so here's my take on the Hunter's Knife.  


The original model was designed 3 dimensionally in Rhinoceros, based on a reference image and converted to a .stl for 3D printing. At my place of work we have access to several different 3D printers, I ran through a few Makerbot prints without success and a lot of heater extruder errors (it wouldn't be a makerbot if it didn't mess up at least once) haha.

Unable to get a good print on the Makerbot, I found this to be a great opportunity to learn and use the Dimensions printer. The machine we have is a Dimensions SST 1200es, although it has a lower print resolution compared to the Makerbot, it provides a consistent print almost every time.


Here's a quick mock-up photo of the pieces together. The discoloration in the middle section of the blade is due to the acid bath required to dissolve the support material, since the tolerance where slightly higher this solution was able to get into the middle and deteriorate some of the infill support materials, so it kinda looks like a bruise now. Weird I know, either way the pieces will be glued with an ABS specific glue or just regular super glue (Cyanoacrylate Glue). There are a few spots, which will need spot putty, and maybe a little bit of bondo work, but if I can avoid it, that would be ideal.

In the next update the piece should be together as one, and we may start working on molding this bad boy! As always if you found this interesting or have any questions let me know.

Cheers,
Kevin

Tuesday, June 24, 2014

Venture Bros - Henchman 21 - Mask Update I

So with the close of Phoenix ComiCon this year, and not having enough time to create a cosplay that I was happy with (only had about one week to work on anything if I was going to do it). I decided, hey, I should start working on my cosplay stuff now. That way it'll definitely be ready by next years ComiCon or potentially any other conventions I may be attending in the future.

With that being said, I figured a good all around 'can do' cosplay is Henchman 21 from Venture Bros. In addition it's one of my favorite animated shows so it's a win-win. The other reason I chose this cosplay to start with is because I lack skills in the sewing department and having to make the outfit, pouches etc from scratch should prove to help bulster those skills. allowing me the opportunity to work towards much more detailed stuff in the future.

A lot of this information I got from other prop makers, this is merely meant to document my progress and process if at all different. The original concept for doing the mask this way comes from 2 Story Props, and their write up can be found at:

2StoryProps - Monarch Henchman
If you haven't already I would definitely follow these guys as they do some great work! 

Alright so, onto the Build!


The most important thing here is knowing that anything animated, is not precise. If you watch any episode you'll see that the shape/size/orientation of the mask can change and vary quite drastically at times. So make something you find aesthetically pleasing.

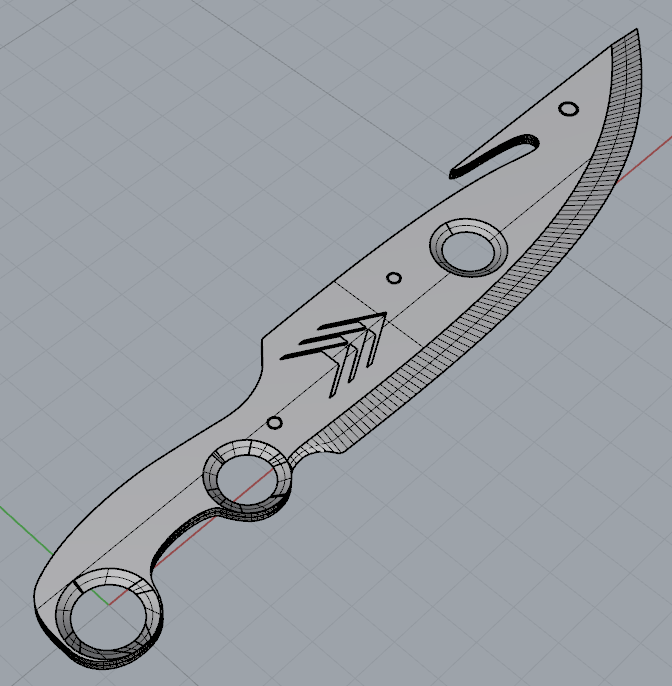
I started with a reference photo, scaled it to my height in illustrator, and took rough measurements of the mask based on the photo. Once I had the dimensions I than drew it out roughly to size on some cardstock. I cut it out and tried it on. From there I needed to modify some things like the overall width ( I have a big head ) and distance between the eye holes.

Once all that was figured out I made one side of the template creased it in the middle and made the other side of the template (by tracing the outline). This could have been just as easily done in Illustrator or any other image manipulation program, I just chose to do it manually.


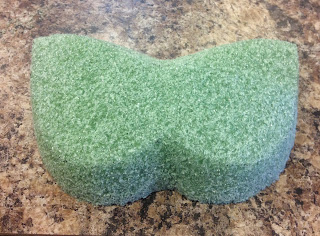
The foam I am using is hard green Styrofoam which comes in a variety of thickness and sizes.
This particular sheet I bought over-sized as I knew i could use it elsewhere.
It was 26.8 x 11.8 x 1.8 inches and I purchased it from my local Michael crafts store.
Michael's also sells soft green 'flower' foam. You do not want this as it crumbles and is somewhat difficult to work with.


I started by tracing my template on my foam block, Using a serrated bread knife I shaped the mask angle and here you can see it starting to take shape. However here's where I made a mistake, although not detrimental, I just ended up doing twice the amount of work. The correction would have been to cut the crown or the concave surface first before tracing out the masking and cutting that profile. I have a few picture of this process, but they aren't as important.

Taking small amounts off at a time can be annoying but you can't put the foam back on once you've cut too much off, or at least not easily, so keep that in mind!


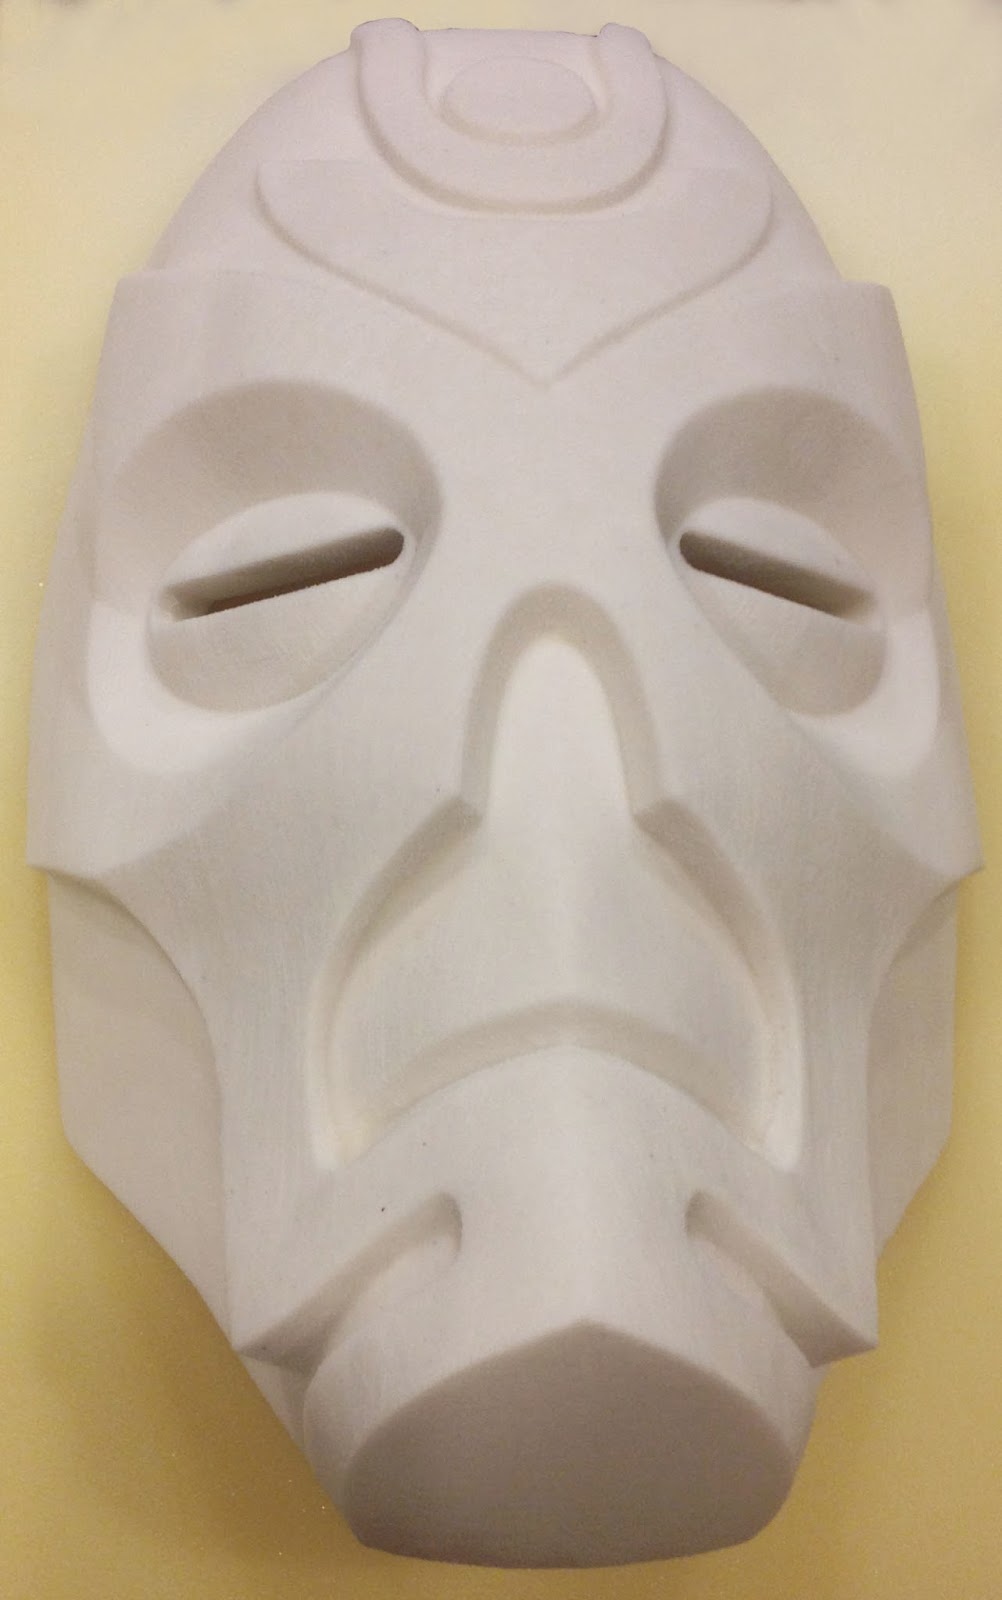
Here is a photo of the finished rough carved mask with the exception of eyes holes. It's difficult to capture both angle, but you will be able to see it better in the following images. 


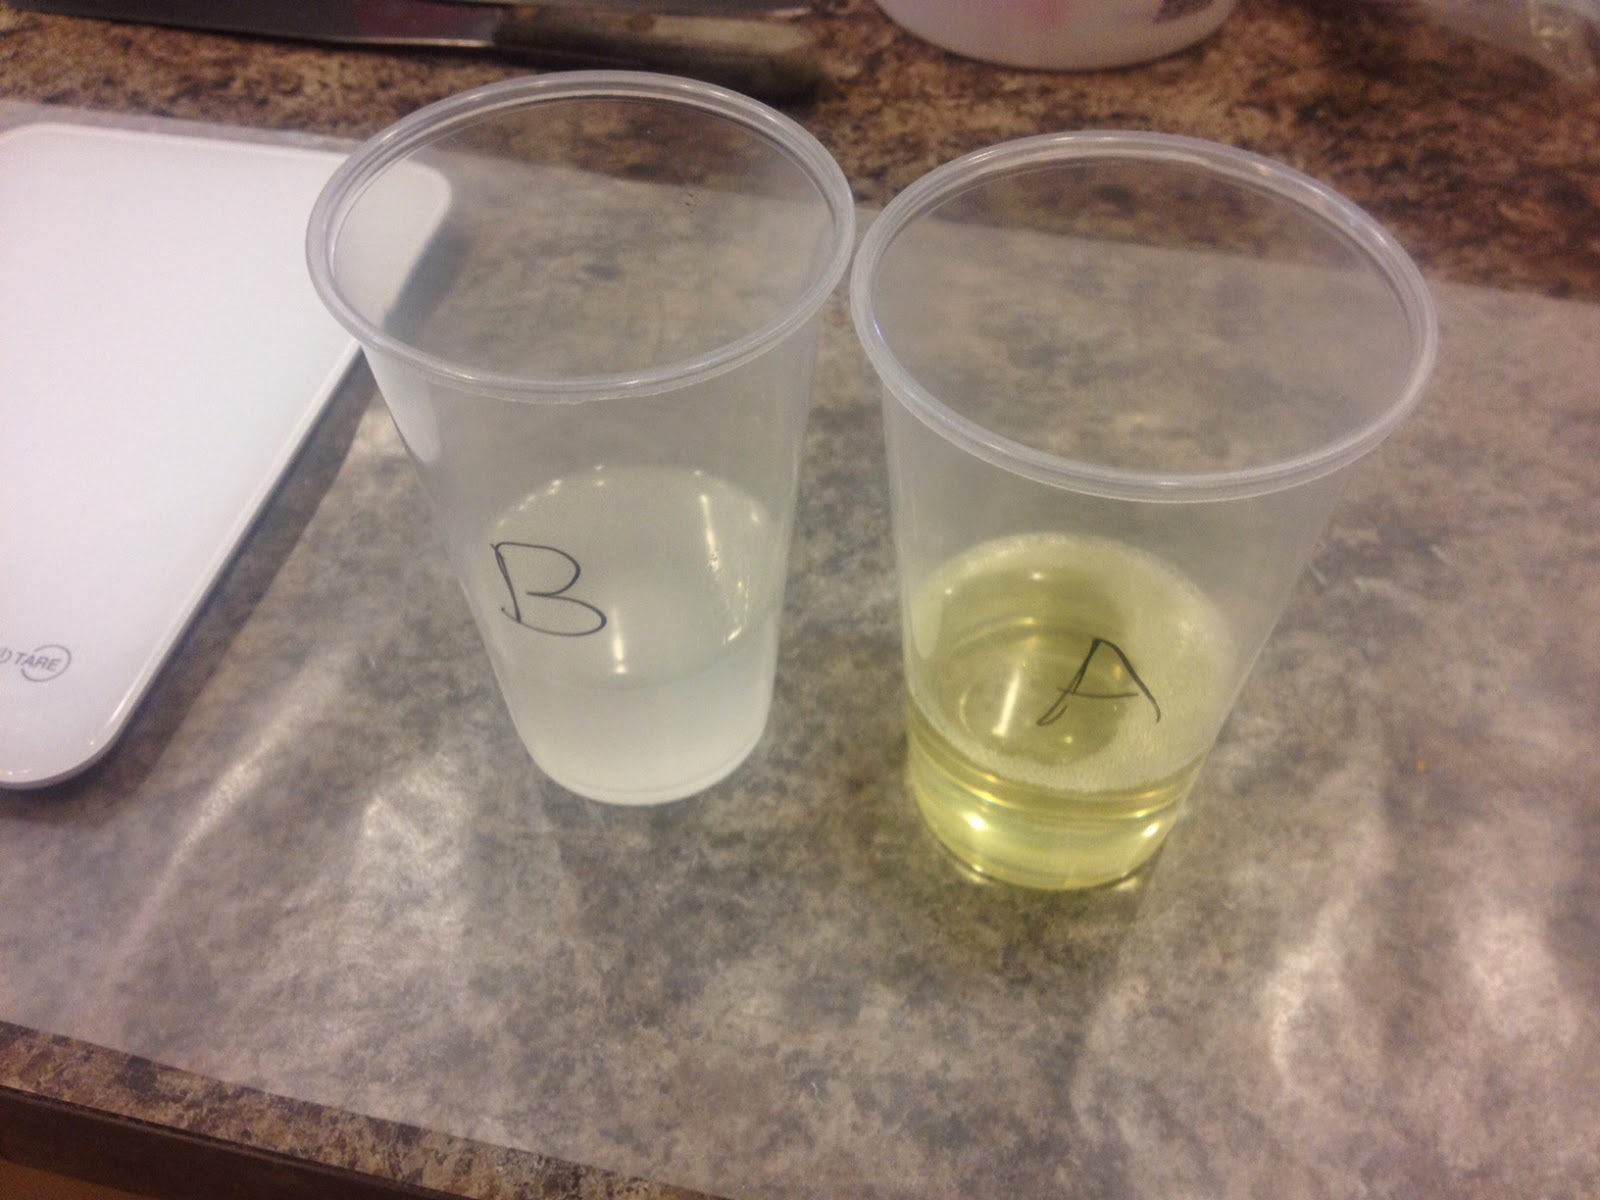
So once I cut out the eye holes and retraced them onto the foam using a sharpie, I first drilled a large hole in the center of each eye. From there I used a rather course round rasp to gradually step the eyes down, working my way from the center outward. We're now ready for the hard part, Bondo!


I joke in saying that Bondo is the hard part, but it's my least favorite. Bondo is great and I have a decent amount of experience with it, but living in AZ working time unless you severely reduce the amount of hardener can be a bit of a challenge. The photo above was my first pass of bondo applied rather heavy and as a result a little uneven, but as you can see it's starting to take shape.

The tool in the photograph is a metal rasp that can easily be bent into different forms, I'll have to get the name of it later, but I used this to knock down any high spots while the Bondo was still curing, after it's dries your only real option from there is to sand it.

Stay tuned for future parts of this build!
I will be posting more as soon as I can get more accomplished, please ask question or let me know if this was helpful or what I could do to make it more so.

Cheers,
Kevin